How To Take Acer Screenshot On ChromeBook [2023]

How to Take Acer Screenshots on Chromebook
How to Take Acer Screenshots on Chromebook
If you want to take an Acer screenshot of a specific area on your Chromebook, you can do so by clicking on the screenshot notification on the home taskbar.
You can capture the entire screen, a single window, or part of the screen. Once you’ve captured a screenshot, you can copy it to the Clipboard.
You can also save the screenshot to Tote, which was introduced with Chrome OS 89. This handy feature keeps important files close to your fingertips.

You can also take a screenshot using the stylus on your Chromebook. To use the stylus, open the “Stylus” tool from the bottom right shelf.
Next, click on “Capture Screen.” You can also take a partial screenshot by touching and holding the stylus on the area you want to capture and dragging it to the final point.
Once you’ve captured the area you want, you can save it to a folder of your choice.
Once you’ve clicked on the screenshot button, a screenshot toolbar will appear on your Chromebook’s screen. Click the full-screen option to take a full-page screenshot, or use the partial screenshot option to select the window you want to capture.
If you want to edit the screenshot, you can go into the Windows Photo Editor.
Once you’ve saved the screenshot, you’ll see a thumbnail at the bottom right corner of your screen. To view your screenshots offline, click the Downloads folder icon.
From there, you can view your screenshots by selecting Files, Images, or Downloads. You can also use Google Photos to save screenshots and use them on other devices.
Also, read How To Install Gorilla Build Kodi ,How To Install Evolve On Kodi.
Take a Screenshot With the Keyboard Shortcut
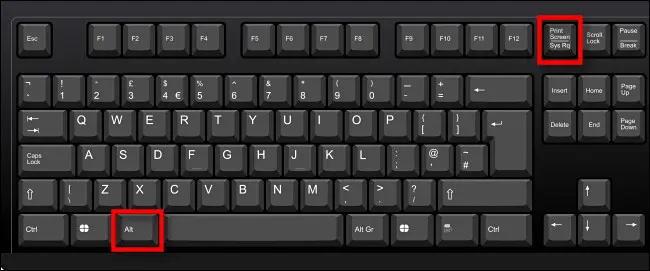
If you’d like to take a screenshot with your keyboard, there are several keystrokes that you can use. The Print Screen key (also known as PrtSc) is a shortcut that you can find on most keyboards.
It’s usually located in the top row, after the F12 key. When you press this key, it will capture an image of your screen to the clipboard.
Once you’re ready to save the screenshot, you can paste it into a program by pressing Ctrl+V. Depending on your keyboard, you may have to select a format and file.
Fn + Windows + Print Screen captures a screenshot of the entire screen
The Print Screen keyboard shortcut allows you to take a screenshot of your entire screen. This keyboard shortcut is often abbreviated as “PrtScn,” but it can also be accessed by pressing the Fn key. It’s located on the bottom left of the keyboard next to the Windows key. The shortcut can also use with the Insert key, which emulates the Print Screen button.
Using this keyboard shortcut, you can take a screenshot of a whole screen without selecting any particular windows.
Another keyboard shortcut is Fn + Windows + Print Screen. This keyboard shortcut saves a screenshot of the entire screen as an image and will save the screenshot in the Pictures folder on your PC.
But, some Windows tablets may not have a keyboard, and the Print Screen key won’t work on them.
Fortunately, there are other ways to take a screenshot, such as pressing the Windows logo button and pressing the Volume Down key.
keyboard shortcuts
Windows 10 offers a variety of keyboard shortcuts to capture screenshots. The Fn + Windows + Print Screen keyboard shortcut will take a screenshot of the current window.
It’s also possible to capture screenshots within specific applications. For example, if you’re viewing an animated video, you can capture the moment by hitting Fn + Windows + Print Screen. To save the screenshot, you can select Ctrl + S, or you can click the save icon.
By default, the screenshot will be saved to /Documents/Lightshot. But you can also save it to other locations. It’s a fast and convenient way to capture a particular moment in a video or animation.
If you don’t have a keyboard, you can use hardware buttons. On Surface tablets with Windows 10 operating system, the volume down button will capture a screenshot.
Another keyboard shortcut to take a screenshot is Fn + Spacebar, which will capture a snapshot of the current window.
You can copy a part of the screen to the clipboard
A keyboard shortcut is a quick way to copy a part of the screen. For example, you can copy a screenshot of the text on a webpage and paste it into another application.
Pressing the Windows key and Shift key simultaneously will copy the selected text or image to the clipboard.
Also, the screenshot can be edited and saved with a variety of effects. Or, you can use the hotkey combination Alt+PrtScn to save a screenshot instead of copying it.
Another keyboard shortcut is Ctrl+X. This will copy text or images on the screen and send them to the clipboard in system memory.
This allows you to paste the same text or image several times without losing the content. Before, Windows didn’t automatically store the history of the items you copied, but with the October 2018 Update, this feature has been added.
You can save a screenshot to OneDrive
The keyboard shortcut PrtSc works well with OneDrive to save a screenshot to the cloud. The screenshot will be saved in the Pictures folder in the OneDrive cloud.
The screenshot can then be pasted into an image editor. For example, you could paste the screenshot into MS Paint.
The keyboard shortcut will also work if you want to save a screenshot without saving it to OneDrive.
This keyboard shortcut works to capture the whole screen and save it as a PNG file. Note that the keyboard shortcut is not always compatible with the Windows modifier keys.
Some keyboards may write PrtSc out completely.
How to Take a Full Acer Screenshot on Chromebook
There are a few ways to capture screenshots on your Chromebook. Whether you want to save a full screenshot, edit a screenshot, or take a partial one, there are a few basic steps to follow. Using the screenshot tools, you can crop, resize, and add filters to the screenshot.
Taking an Acer screenshot
You can easily take a full screenshot on your Chromebook by following some simple steps. Once you have completed taking a screenshot, you can save it to your computer and edit it later with the built-in editing features.
You can access the screenshots you’ve taken by clicking the notification at the bottom of the screen or by navigating to the Files app and then clicking the screenshot you took.
After you have completed this, the screenshot will be saved to your Chromebook’s Downloads folder. The Downloads folder is the default location for screenshots.
To open this folder, go to the Files application icon on your Chromebook’s App Launcher. In the Downloads tab, select the screenshots folder and click the “Select screenshot” button. Once you’ve saved the screenshot, you can edit it, copy it, or delete it.
Saving an Acer screenshot
You can save a full screenshot on a Chromebook in two ways: first, by clicking on the screenshot notification at the bottom of the screen, or by clicking on the Files app icon in the App Launcher. You can also access the screenshot in the Downloads section of the Files app. If you want to share the screenshot with another person, you can drag it to Google Drive or another cloud storage account.
You can also take a screenshot using a stylus if your Chromebook has one. You can click the “Stylus Tools” menu on the far right side of your home taskbar, next to the battery and WiFi status indicators.
Once you click the “Stylus Tools” menu, you can then pin the screenshot to your home taskbar. From there, you can take a full screenshot of the current screen.
Editing an Acer screenshot
There are a couple of ways to edit a full screenshot on your Chromebook. One way is to use the image editor built into Chrome OS.
This allows you to crop, rename, and annotate your screenshot. Another way is to use third-party image editing tools. Both PicMonkey and Canva offer free trials and tutorials.
Both tools are compatible with Chromebooks and won’t take up any internal hard drive space.
The screenshot editing tools in Chrome OS are simple. You can crop the screenshot, adjust brightness, and rotate the image. Then, you can save your edits. You can also upload your local files to Google Drive.
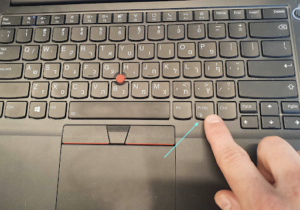
Taking a partial acer screenshot
When using a Chromebook, you may want to take a partial screenshot. You can do this by pressing Shift+Ctrl+Show windows, and then clicking and dragging over a part of the screen. A crosshair icon will appear over the area that is to capture.
By default, screenshots on ChromeOS are saved to the Downloads folder, but you can add extra folders to customize the storage of your screenshots.
You can also take a screenshot of a specific part of your screen by pressing Ctrl + Alt + F5. This will take a screenshot of the current window.
When you do this, the screen will dim automatically. You can also edit and delete the screenshot. The screenshot will be saved in your Chromebook’s Downloads folder. You can change the location of screenshots by going into the Chromebook’s Settings menu.
Taking a screenshot in tablet mode with a stylus
When using a stylus on a Chromebook, you can take a full screenshot by pressing Power + Volume Down or pressing Ctrl + Shift + F5. This method also allows you to crop the screenshot, but it won’t work if you’re trying to capture a partial screen.
In tablet mode, you can use the stylus icon in the dock to capture the screen or simply drag the stylus across the screen to select the region you wish to capture.
The screenshot feature on Chromebooks can also be used in tablet mode. The process is the same as on normal laptops, except for the stylus.
To take a screenshot, hold down the Power and Volume Down side buttons simultaneously. Once you press these two buttons, a menu will pop up. Choose Capture Screen.
FAQ – How to Take Acer Screenshot on Chromebook.
Just press the power button and volume down keys at the same time. If you don’t have this access to a keyboard or even the power button then you can take a grab via the Chrome browser menu by selecting Menu > More tools > Take a screenshot.
To reset your Chromebook, sign out of it, press Ctrl + Alt + Shift + r, click Restart and then click Reset. You can also use the Settings app by going to Settings -> Advanced -> Reset settings and clicking Reset under Powerwash.
Android
1. Open the site that you want to capture.
2. Press the Power button for a few seconds. Then tap Screenshot. …
3 . Your device will take a picture of the screen and save it.
4 . At the top of the screen, you’ll see a Screenshot capture.
Conclusion
This was our guide on How to Take Acer Screenshots on Chromebook.
You can capture the entire screen, a single window, or part of the screen. Once you’ve captured a screenshot, you can copy it to the Clipboard.
You can also save the screenshot to Tote, which was introduced with Chrome OS 89. This handy feature keeps important files close to your fingertips.
We hope that you have found out how to take an Acer screenshot on a Chromebook, if yes then let us know in the comment section.